Home Lab Kubernetes Cluster: Installing Talos Linux on Bare Metal
This is the second post in my home lab Kubernetes series. In the previous post I went over the project overview, hardware, and network planning. Now it's time to actually install an operating system on these machines.
I went with Talos Linux — a minimal, immutable, API-driven OS purpose-built for Kubernetes. One of the things that makes Talos interesting is that it's so API-driven that even the installation is done by pushing a configuration to it through the API. There's no SSH, no shell, no package manager. You configure everything through YAML and talosctl.
I'm on a MacBook Pro (Intel) and decided to install Talos with an ISO for simplicity.
#Downloading the ISO
I downloaded the metal-amd64.iso (Talos 1.9.5) from the Talos releases page.
#Creating the Bootable USB Drive
I mostly followed Ubuntu's guide Create a bootable USB stick on macOS but used the Talos metal-amd64.iso instead. This is a pretty standardized process and there are lots of ways to do it, so I'm not going to go into detail.
I flashed it with Etcher and it was a pretty easy process. Now on to the nodes.
#Preparing the First Control Plane Node
#BIOS Configuration
For the HP EliteDesk Mini, you press Esc to enter the BIOS.
Reset BIOS to Factory Settings
- Select "BIOS Setup"
- Select "Apply Factory Default and Exit"
After restart, enter the BIOS again...
Confirm USB boot is enabled and set to first option
- Go to "Advanced" → "Boot Options"
- Make sure "USB Storage Boot" is checked
- Make sure USB is the top option in the UEFI Boot Order
- Disable "Fast Boot" if available
Enable Virtualization Settings
- Go to "Advanced" → "System Options"
- Make sure "Virtualization Technology (VTx)" is checked
- Make sure "Virtualization Technology for Directed I/O (VTd)" is checked
Disable Secure Boot
- Go to "Security" → "Secure Boot Configuration"
- Change "Configure Legacy Support and Secure Boot" to "Legacy Support Disable and Secure Boot Disable" OR make sure "Secure Boot" is unchecked
Then go back to main, "Save changes and exit." You'll have to enter an authorization code to accept the Secure Boot change.
#Installing Talos on the First Control Plane Node
#Boot the Machine
Plug in the boot drive and boot the machine. When it boots from the USB drive it goes directly into a running Talos OS and you see a terminal dashboard.
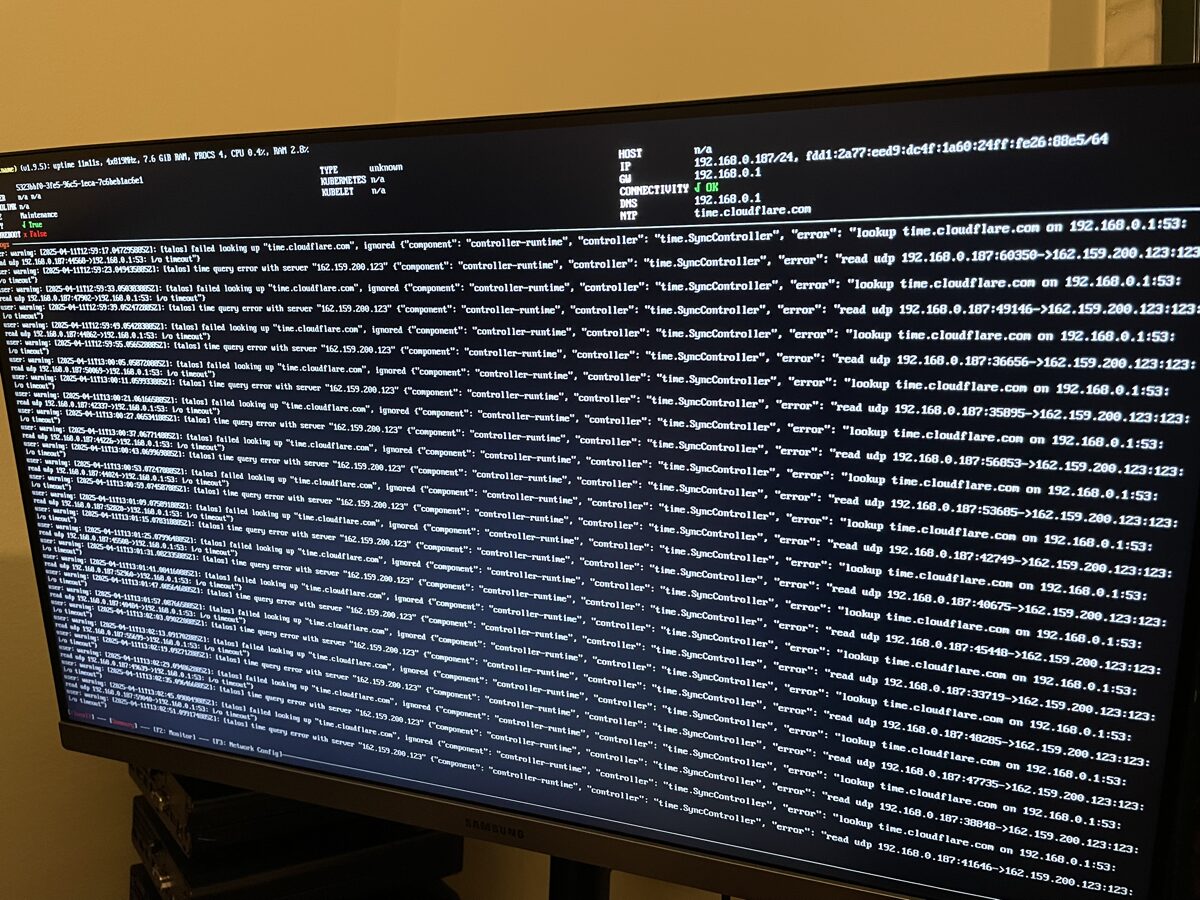
On the dashboard you'll see the IP address and gateway. When I first booted, I'd forgotten to set the switch port to the correct VLAN, so I had to set that up on the switch and reboot the machine. After that I saw the IP and gateway were in the correct range for my VLAN.
Make note of the IP — 192.168.10.187 in my case. My MacBook also needs to be on the same VLAN.
#Setting Up talosctl
With the Talos machine running and the IP address in hand, install talosctl.
Then create a folder for the Talos config files:
mkdir hlkube
mkdir hlkube/talos-cluster
cd hlkube/talos-cluster
Generate the Talos config:
talosctl gen config hlkube-cluster https://192.168.10.10:6443
mkdir patches
touch patches/cp1-patch.yaml
https://192.168.10.10:6443 is the control plane VIP (Virtual IP). I chose 192.168.10.10 because I thought it would be easy to remember.
Let's get a list of the available disks on the machine:
❯ talosctl -n 192.168.10.187 get disks --insecure
NODE   NAMESPACE   TYPE   ID        VERSION   SIZE     READ ONLY   TRANSPORT   ROTATIONAL   WWID                                   MODEL                     SERIAL
       runtime     Disk   loop0     1         74 MB    true
       runtime     Disk   nvme0n1   1         256 GB   false       nvme                     eui.e8238fa6bf530001001b444a467afefc   PC SN530 NVMe WDC 256GB   21061M447620
       runtime     Disk   sda       1         64 GB    false       usb         true                                                Flash Drive
And get the network interfaces:
❯ talosctl -n 192.168.10.187 get addresses --insecure
NODE   NAMESPACE   TYPE            ID                                  VERSION   ADDRESS                        LINK
       network     AddressStatus   eno1/192.168.10.187/24              1         192.168.10.187/24              eno1
       network     AddressStatus   eno1/fe80::1a60:24ff:fe26:88e5/64   2         fe80::1a60:24ff:fe26:88e5/64   eno1
       network     AddressStatus   lo/127.0.0.1/8                      1         127.0.0.1/8                    lo
       network     AddressStatus   lo/::1/128                          1         ::1/128                        lo
Since all the control plane nodes are identical, I can keep the disk configuration the same for all of them. I left controlplane.yaml unchanged but created a patches/cp1-patch.yaml with the correct disk, network, hostname, and IP:
machine:
  install:
    disk: /dev/nvme0n1
  network:
    hostname: cp1
    interfaces:
      - interface: eno1
        vip:
          ip: 192.168.10.10
        addresses:
          - 192.168.10.11/24
        routes:
          - network: 0.0.0.0/0
            gateway: 192.168.10.1
    nameservers:
      - 192.168.10.1
Then apply the config to the first machine:
talosctl apply-config \
  --insecure \
  --nodes 192.168.10.187 \
  --file controlplane.yaml \
--config-patch @patches/cp1-patch.yaml#First Issue: Wrong IP in the Patch File
After a bunch of copy and pasting I forgot to update the IP right before applying. Classic.
I updated the patch file and tried to apply again to the new IP:
❯ talosctl apply-config \
  --insecure \
  --nodes 192.168.10.99 \
  --file controlplane.yaml \
  --config-patch @patches/cp1-patch.yaml
error applying new configuration: rpc error: code = Unavailable desc = connection error: desc = "error reading server preface: remote error: tls: certificate required"
Tried without the --insecure flag too:
❯ talosctl apply-config \
  --nodes 192.168.10.10 \
  --file controlplane.yaml \
  --config-patch @patches/cp1-patch.yaml
error constructing client: failed to determine endpoints
I thought the best way to handle this was to reboot into the USB installer and try again. But that didn't work either:
❯ talosctl apply-config \
  --insecure \
  --nodes 192.168.10.187 \
  --file controlplane.yaml \
  --config-patch @patches/cp1-patch.yaml
error applying new configuration: rpc error: code = Unavailable desc = connection error: desc = "transport: Error while dialing: dial tcp 192.168.10.187:50000: connect: connection refused"
And on the monitor I saw: "Talos is already installed to disk but booted from another media and talos.halt_if_installed kernel parameter is set. Please boot from disk."
So I kind of messed things up a bit. But when I rebooted, the bootloader had two options: "Talos OS" and "Reset Talos Installation." I selected the reset, and it started fresh. After that I was able to re-apply the config with the correct IP.
#Bootstrapping the cp1 Node
After the apply-config, the monitor showed:
"etcd is waiting to join the cluster, if this node is the first node in the cluster, please run
talosctl bootstrapagainst one of the following IPs: [192.168.10.11]"
So I did:
talosctl bootstrap --talosconfig talosconfig --nodes 192.168.10.11 --endpoints 192.168.10.11The command was successful but didn't return anything. I saw a bunch of things happen on the monitor and eventually the green checkbox for "Ready" appeared.
I powered down, took out the USB, and powered on just to make sure it loaded OK. But then I noticed an issue...
#Second Issue: Ghost Machine
On the monitor I saw: "CLUSTER hlkube-cluster (2 machines)"
There was only 1 machine. My best guess is that it had some leftover config from the IP address mistake, because that same mistake had set the hostname to something different too.
I tried resetting the etcd state:
talosctl reset --talosconfig talosconfig --nodes 192.168.10.11 --endpoints 192.168.10.11 \
  --graceful=false --reboot --system-labels-to-wipe=STATE
This command seemed to do something initially but then hung for a long time. After about 5 minutes I gave up and pressed the power button. Re-inserted the USB, selected "Reset Talos Installation," then re-ran the apply-config and bootstrap commands.
After all of that, everything looked good. I powered down, took out the USB, and powered on. All clear.
#First Control Plane Node is Installed!
❯ talosctl --talosconfig talosconfig --endpoints 192.168.10.10 --nodes 192.168.10.10 health

discovered nodes: ["192.168.10.10"]
waiting for etcd to be healthy: ...
waiting for etcd to be healthy: OK
waiting for etcd members to be consistent across nodes: ...
waiting for etcd members to be consistent across nodes: OK
waiting for etcd members to be control plane nodes: ...
waiting for etcd members to be control plane nodes: OK
waiting for apid to be ready: ...
waiting for apid to be ready: OK
waiting for all nodes memory sizes: ...
waiting for all nodes memory sizes: OK
waiting for all nodes disk sizes: ...
waiting for all nodes disk sizes: OK
waiting for no diagnostics: ...
waiting for no diagnostics: OK
waiting for kubelet to be healthy: ...
waiting for kubelet to be healthy: OK
waiting for all nodes to finish boot sequence: ...
waiting for all nodes to finish boot sequence: OK
waiting for all k8s nodes to report: ...
waiting for all k8s nodes to report: OK
waiting for all control plane static pods to be running: ...
waiting for all control plane static pods to be running: OK
waiting for all control plane components to be ready: ...
waiting for all control plane components to be ready: OK
waiting for all k8s nodes to report ready: ...
waiting for all k8s nodes to report ready: OK
waiting for kube-proxy to report ready: ...
waiting for kube-proxy to report ready: OK
waiting for coredns to report ready: ...
waiting for coredns to report ready: OK
waiting for all k8s nodes to report schedulable: ...
waiting for all k8s nodes to report schedulable: OK
That wall of green OKs felt really good.
#Installing Talos on the First Worker Node
I followed the same BIOS setup as above. Then grabbed the disk info:
❯ talosctl -n 192.168.10.251 get disks --insecure
NODE   NAMESPACE   TYPE   ID        VERSION   SIZE     READ ONLY   TRANSPORT   ROTATIONAL   WWID                                   MODEL                     SERIAL
       runtime     Disk   loop0     1         74 MB    true
       runtime     Disk   nvme0n1   1         256 GB   false       nvme                     eui.a0329953d5030359                   LENSE20256GMSP34MEAT2TA   1188050100359
       runtime     Disk   nvme1n1   1         2.0 TB   false       nvme                     eui.e8238fa6bf530001001b448b4d9029e5   WD Blue SN580 2TB         245105803152
       runtime     Disk   sda       1         64 GB    false       usb         true                                                Flash Drive
I created a worker patch file with the same structure as the control plane patch, just with the worker's hostname and IP, and applied it:
talosctl apply-config \
  --insecure \
  --nodes 192.168.10.251 \
  --file worker.yaml \
  --config-patch @patches/w1-patch.yaml
And that worked without a hitch. Now we had a control plane node and a worker node:
❯ talosctl --talosconfig talosconfig --endpoints 192.168.10.10 --nodes 192.168.10.10 get members
NODE            NAMESPACE   TYPE     ID    VERSION   HOSTNAME   MACHINE TYPE   OS               ADDRESSES
192.168.10.10   cluster     Member   cp1   3         cp1        controlplane   Talos (v1.9.5)   ["192.168.10.10","192.168.10.11"]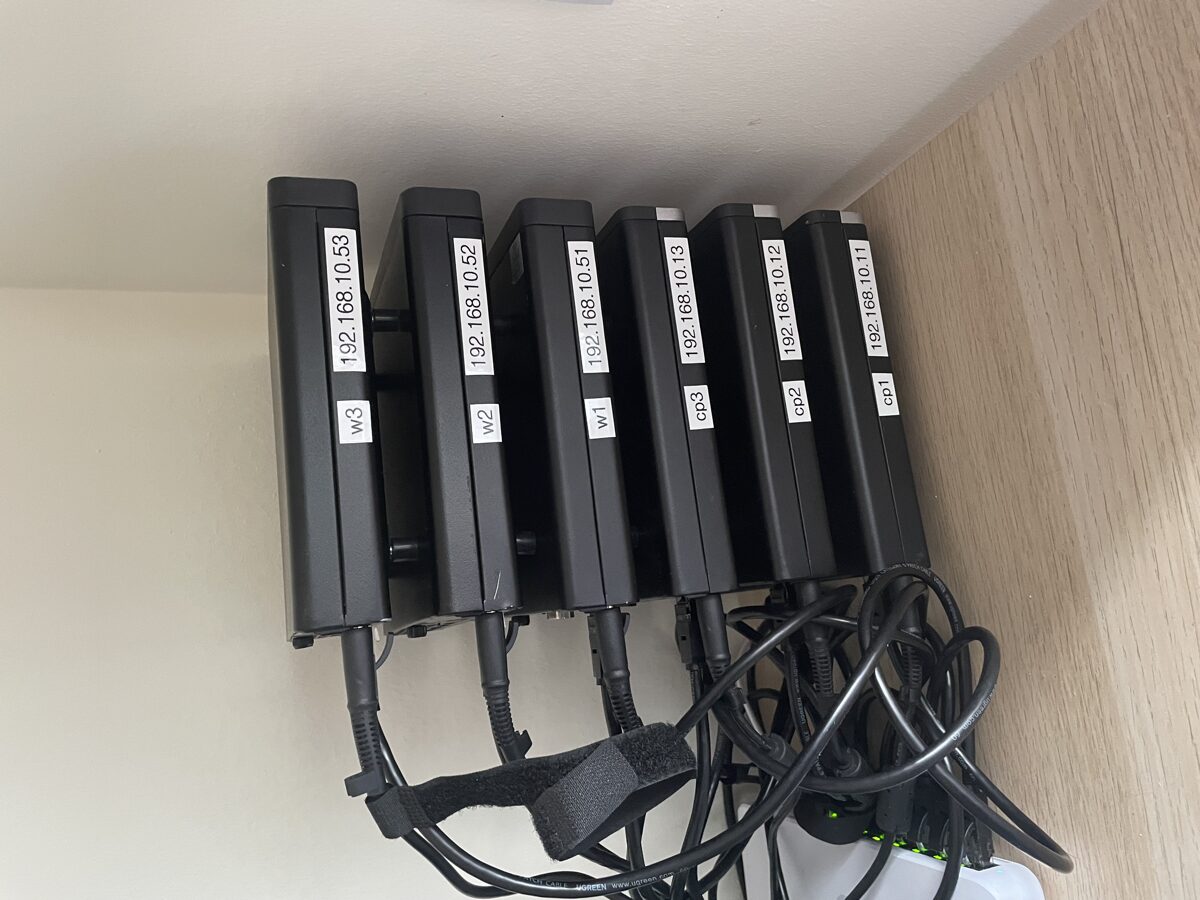
192.168.10.10 cluster Member w1 1 w1 worker Talos (v1.9.5) ["192.168.10.51"]#Setting Up the Remaining Nodes
I set up the rest of the worker nodes first. I duplicated all the patch files, one for each remaining node, and only changed the IP address and hostname. But of course, things didn't go entirely smoothly.
#Issue 3: Stripped Screw on Flex IO Card
I'd bought 3 2.5GbE Flex IO V2 NICs, one for each worker node. But when trying to remove the existing Flex IO card on w1, one of the screws was on so tight. I tried everything — the rubber band trick, pliers — but eventually completely stripped that tiny little screw. It's about the same size as an M.2 screw. So small.
I eventually admitted defeat and installed with the existing onboard 1GbE NIC. I think I'll take it to an electronics repair shop and see if they can help me remove it.
#Issue 4: Password-Protected BIOS on w2
On worker node 2, I had to manually reset the BIOS password, which was a real pain. I had to create a jumper wire by sacrificing a Cat5 cable and manually short out the second pin of the HP Sure Boot flash chip, following these instructions.
Then after that I had this strange issue where the Talos boot would get stuck on an "Adjusting time" step and just hang there.
I pressed e during the bootloader (the screen where you see "Talos OS" or "Reset Talos Installation"), which brought me into an Emacs-like config editor. I tried enabling debug mode but the setting didn't stick. However, something about re-entering the boot process from that editor caused it to actually load. I rebooted one more time, pressed e, immediately exited without making changes (Ctrl + X), and that worked. I have no idea why.
#All Nodes Online
Once I got past those few issues, things went smoothly. Just applying the config to each new node.
All nodes online:
❯ talosctl --talosconfig talosconfig --endpoints 192.168.10.10 --nodes 192.168.10.10 get members
NODE            NAMESPACE   TYPE     ID    VERSION   HOSTNAME   MACHINE TYPE   OS               ADDRESSES
192.168.10.10   cluster     Member   cp1   9         cp1        controlplane   Talos (v1.9.5)   ["192.168.10.10","192.168.10.11"]
192.168.10.10   cluster     Member   cp2   1         cp2        controlplane   Talos (v1.9.5)   ["192.168.10.12"]
192.168.10.10   cluster     Member   cp3   1         cp3        controlplane   Talos (v1.9.5)   ["192.168.10.13"]
192.168.10.10   cluster     Member   w1    1         w1         worker         Talos (v1.9.5)   ["192.168.10.51"]
192.168.10.10   cluster     Member   w2    1         w2         worker         Talos (v1.9.5)   ["192.168.10.52"]
192.168.10.10   cluster     Member   w3    1         w3         worker         Talos (v1.9.5)   ["192.168.10.53"]
Six nodes, all reporting in. That felt like a real milestone.
#Adding Worker Labels
Later I went back and edited worker.yaml to give all the workers a node-type: worker label. This was to help Longhorn (our storage solution) filter which nodes to target for storage:
machine:
  nodeLabels:
    node-type: worker
Then applied to each worker with a reboot:
talosctl apply-config --talosconfig talosconfig --nodes 192.168.10.51 \
  --file worker.yaml --config-patch @patches/w1-patch.yaml \
--mode reboot --endpoints 192.168.10.10#What's Next
With Talos installed on all six nodes, the cluster is running but it's basically empty. In the next post I'll cover setting up Flux CD for GitOps, so we can manage the cluster state through a Git repository instead of running kubectl commands by hand.